Grilling is more than just cooking; it’s a culinary adventure that brings friends and family together over sizzling flavors and mouthwatering aromas. And when it comes to grilling, the Weber brand is synonymous with quality and innovation.
One of their game-changing accessories, the Weber charcoal basket, can take your grilling experience to the next level. Here’s a step-by-step guide on how to use Weber charcoal baskets to enhance your grilling experience:
How to Use Weber Charcoal Baskets – Step-by step
Step 1: Assembling Your Charcoal Baskets
- Gather Your Materials: Make sure you have your Weber charcoal baskets, your grill, and the charcoal you plan to use.
- Inspect the Baskets: Before assembly, check the charcoal baskets for any defects or damage.
- Attach Handles (If Applicable): Some Weber charcoal baskets come with handles for easy handling. If your baskets have handles, attach them according to the manufacturer’s instructions.
Step 2: Placing the Charcoal Baskets in the Grill
- Choose Your Cooking Zone: Decide whether you’ll be using a direct heat zone (right over the charcoal) or an indirect heat zone (beside the charcoal) for your grilling.
- Position the Baskets: If you’re using a charcoal grill, place the charcoal baskets on either side of the grill, leaving the center empty. For a kettle-style grill, position the baskets on opposite sides of the lower charcoal grate.
Step 3: Choosing the Right Charcoal
- Select High-Quality Charcoal: Opt for good-quality charcoal, preferably lump charcoal or briquettes without added chemicals.
- Fill the Baskets: Fill each basket with the desired amount of charcoal. The amount of charcoal you use will depend on the size of your grill and the type of food you’re cooking.
Step 4: Lighting the Charcoal
- Use a Chimney Starter (Recommended): Place a chimney starter filled with charcoal on your grill’s charcoal grate. Light a piece of newspaper under the chimney to ignite the charcoal. Wait for the charcoal to ash over before proceeding.
Step 5: Adding Lighted Charcoal to the Baskets
- Transfer the Charcoal: Carefully pour the lit charcoal from the chimney starter into each of the charcoal baskets.
- Arrange the Coals: Use tongs to arrange the charcoal in an even layer within the baskets.
Step 6: Mastering Temperature Control
- Adjust the Vents: Open and close the grill’s vents to control the airflow and, consequently, the temperature. Open vents for higher heat and close them for lower heat.
- Create Heat Zones: With charcoal baskets, you can easily create direct heat zones (above the baskets) and indirect heat zones (away from the baskets).
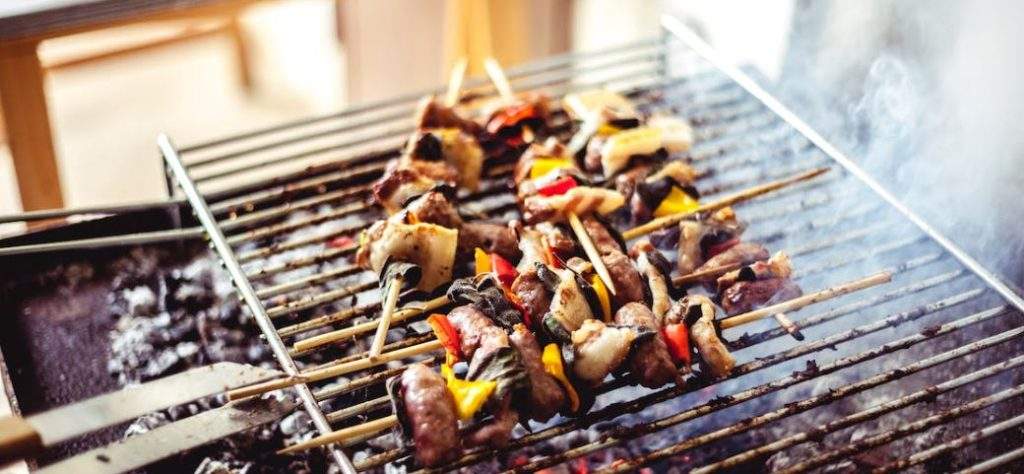
Step 7: Grilling Techniques with Charcoal Baskets
- Direct Heat Grilling: Place food directly over the baskets for quick searing. Ideal for steaks, burgers, and vegetables that cook relatively fast.
- Indirect Heat Cooking: For foods that require longer cooking times, place them away from the baskets to cook using indirect heat. This is great for roasting larger cuts of meat and smoking.
Step 8: Maintenance and Cleaning
- Empty Ashes: After grilling, allow the ashes to cool. Use a grill brush to sweep the ashes from the charcoal baskets into the ash collection area of your grill.
- Clean the Baskets: Periodically clean the baskets to prevent ash buildup. A wire brush or scraper can help remove residue.
Remember, safety is paramount when using charcoal baskets. Always follow the manufacturer’s instructions and practice proper fire safety when grilling. With Weber charcoal baskets, you’re equipped to create a range of delicious grilled dishes, from perfectly seared steaks to flavorful smoked ribs. Enjoy the process and the flavors that come from mastering this grilling technique!
Also Read>> Best Rotisserie for Weber Kettle – Do you Need One?
What are Weber char baskets for?
Weber charcoal baskets, often referred to as Weber Char-Basket Charcoal Briquet Holders, are specialized grilling accessories designed to enhance your charcoal grilling experience. These baskets are primarily used to manage the distribution of charcoal within your grill, providing better control over heat zones and allowing you to achieve different cooking techniques.
The main purposes of Weber charcoal baskets include:
1. Heat Management
Charcoal baskets help you create distinct heat zones within your grill. By placing the baskets on opposite sides of the grill and filling them with charcoal, you can create both direct heat zones (right over the baskets) and indirect heat zones (away from the baskets). This flexibility is crucial for various grilling techniques, such as searing, roasting, and smoking.
2. Indirect Cooking
Indirect cooking involves placing the food away from the heat source, which is ideal for larger cuts of meat that require longer cooking times. Charcoal baskets enable you to set up an indirect heat zone easily, ensuring even and consistent cooking without the risk of burning or charring the food’s exterior.
3. Direct Grilling
For foods that benefit from quick searing and high heat, such as burgers, steaks, and kebabs, you can position the food directly over the charcoal baskets. This setup allows for intense, direct heat that achieves the desired sear and char marks.
4. Smoking
When using wood chips or chunks for smoking, charcoal baskets provide a convenient way to place the smoking material directly next to the charcoal. This creates a consistent flow of smoke that imparts flavor to the food as it cooks.
5. Easy Charcoal Management
Charcoal baskets simplify the process of handling and arranging charcoal in your grill. They help prevent charcoal from spreading unevenly or shifting during cooking, ensuring that you have better control over the cooking process.
6. Ash Management
The design of charcoal baskets also aids in ash management. Ashes tend to accumulate during the grilling process, and the baskets help contain them, making it easier to dispose of the ashes after grilling.
7. Versatility
Whether you’re using a kettle grill, a barrel smoker, or even a larger grill, charcoal baskets can be adapted to various grill types. Their versatility allows you to customize your grilling setup based on the type of food you’re cooking and the desired cooking technique.
What’s the point of a charcoal basket?
A charcoal basket serves the purpose of managing charcoal placement in a grill. It allows for controlled heat distribution, enabling various grilling techniques such as direct grilling, indirect cooking, and smoking by creating distinct heat zones. This enhances cooking precision, prevents uneven charcoal spread, aids in ash management, and contributes to better flavor and texture in grilled foods.
How do you arrange charcoal on a Weber grill?
Arranging charcoal on a Weber grill involves careful placement to create different heat zones for various grilling techniques. Here’s how you can arrange charcoal on a Weber grill:
For Direct Heat Grilling
- Prepare Charcoal: Fill a chimney starter with the desired amount of charcoal and light it. Wait until the charcoal is covered with ash.
- Spread Charcoal: Once the charcoal is ready, pour it evenly over one side of the charcoal grate. This creates a hot, direct heat zone where you can achieve quick searing and char marks on your food.
- Cooking: Place the food directly over the charcoal. Keep a close eye on it, as the high heat may cook food quickly.
For Indirect Heat Cooking
- Prepare Charcoal: Light the charcoal in a chimney starter until it’s covered with ash.
- Divide the Grill: Push the lit charcoal to one side of the grill. On the other side, leave the charcoal grate empty. This creates an indirect heat zone, where the food will cook using indirect heat and convection.
- Cooking: Place the food on the side of the grill without charcoal underneath. This method is ideal for cooking larger cuts of meat that require longer cooking times. Close the lid to allow even cooking through convection.
For Two-Zone Cooking
- Prepare Charcoal: Light the charcoal in a chimney starter.
- Divide the Grill: Place equal amounts of lit charcoal on both sides of the grill’s charcoal grate, leaving the center empty. This creates two distinct heat zones: direct heat on both sides and an indirect heat zone in the center.
- Cooking: Place food over the direct heat for searing or fast cooking. Move the food to the indirect heat zone to finish cooking without excessive charring.
For Smoking
- Prepare Charcoal: Light the charcoal in a chimney starter.
- Divide the Grill: Push the lit charcoal to one side of the grill and place an aluminum foil packet filled with soaked wood chips or chunks directly on top of the lit charcoal. This will create smoke for flavoring the food.
- Cooking: Place the food on the opposite side of the grill, away from the lit charcoal and smoke packet. Close the lid to allow the smoke to infuse the food while cooking.
Remember that the arrangement of charcoal can vary based on the size of your grill, the type of food you’re cooking, and your desired cooking method. Always follow safety precautions when handling hot charcoal and keep a close watch on the grilling process.
Conclusion
The Weber charcoal basket is more than just a grilling accessory; it’s a tool that empowers you to craft culinary wonders in your own backyard. From perfectly seared steaks to delicately smoked ribs, the possibilities are endless.
By understanding the nuances of charcoal basket grilling, you’ll embark on a journey of flavor exploration and outdoor cooking mastery. So, fire up those baskets, savor the moments around the grill, and let the Weber charcoal basket elevate your grilling game to new heights. Happy grilling!
Courtney is a professional grilling enthusiast who has spent a good portion of his life grilling and exploring different methods and techniques for preparing delicious meals. As he always says, creativity is key to preparing sumptuous meals.