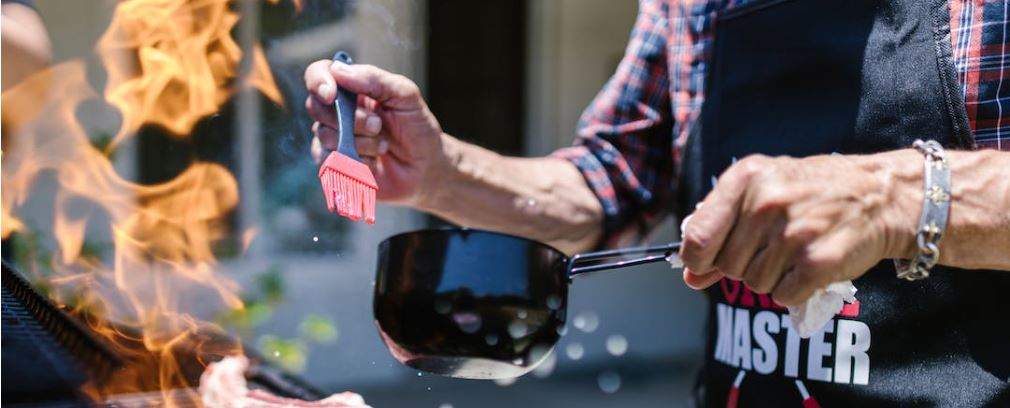
A BBQ brush makes it easy for you to put BBQ sauce on the ribs for an elevated flavor. However, if you do not have a BBQ Sauce readily available, you can always find an alternative to help you accomplish the objective. So, how do you put BBQ sauce on ribs without a brush?
To put BBQ sauce on ribs without a brush, you can either pour the sauce directly onto the ribs and use a spoon to spread it evenly or use your hands/fingers to rub the sauce into the ribs for even coverage.
Read on for more details on how to effectively put BBQ sauce on the ribs without a brush.
How to Put BBQ Sauce on Ribs Without a Brush (Alternative Methods)
You can put your CBD infused BBQ sauce or your ordinary BBQ sauce on ribs without a brush using alternative methods. Here’s how:
- Use a Spoon or Ladle: Pour a generous amount of BBQ sauce onto the ribs. Then, use a spoon or ladle to spread the sauce evenly over the surface of the ribs. This method allows you to control the amount of sauce you apply.
- Marinating: Marinating the ribs in BBQ sauce is an effective way to infuse them with flavor. Place the ribs and BBQ sauce in a large resealable plastic bag or a covered container. Allow them to marinate in the refrigerator for several hours or overnight.
- Rub it In: Wearing food-safe gloves, use your hands to rub the BBQ sauce into the ribs. This hands-on approach can help ensure that the sauce penetrates the meat and provides a flavorful coating.
- Basting: While grilling or smoking the ribs, you can baste them with BBQ sauce using a long-handled spoon or a heat-resistant silicone basting brush. Dip the spoon or brush into the sauce and then drizzle or brush it onto the ribs during the cooking process. Be careful with open flames, as sugar in the sauce can cause flare-ups.
- Warm it Up: If the BBQ sauce is thick or refrigerated, you can warm it up before applying it. Heat it in a saucepan on low heat or in the microwave for a short time until it becomes more liquid and easier to spread.
- Use a Plastic Bag: Put the ribs and BBQ sauce in a large resealable plastic bag. Seal the bag and then massage it gently to coat the ribs evenly with the sauce. This method is similar to marinating but can be done quickly if you’re in a hurry.
Remember that regardless of the method you choose, it’s important to handle food safely. Keep surfaces and utensils clean, and make sure the ribs reach a safe internal temperature during cooking to prevent foodborne illnesses. Enjoy your saucy ribs!
Also read>> What is the Best Basting Brush? (Elevate your grilling experience)
What can I use if I don’t have a basting brush?
If you don’t have a basting brush, you can use several alternative tools to apply BBQ sauce or other liquids to your food:
- Spoon: Use the back of a spoon to drizzle or spread the sauce over your food.
- Silicone or Rubber Gloves: Put on clean kitchen gloves and dip your fingers into the sauce. Then, rub it onto the food.
- Paper Towel: Fold a piece of paper towel into a small pad, dip it into the sauce, and then gently dab or spread it onto the food.
- Spray Bottle: If the sauce is thin enough, you can use a clean spray bottle to mist it over your food.
- Marinade Injector: This is a tool designed to inject liquids into meat. You can use it to inject sauce into the meat for added flavor.
- Plastic Bag: Place the food and sauce in a sealable plastic bag. Seal it and then massage the sauce into the food by squishing the bag.
Choose the method that works best for your specific dish and the consistency of the sauce you’re using. Be sure to clean and sanitize any tools you use for food preparation.
What can I use if I don’t have an egg wash brush?
If you don’t have an egg wash brush, you can use alternative tools or methods to apply an egg wash to your baked goods. Here are some options:
- Fork: Beat the egg in a small bowl and use a fork to drizzle it over the pastry or dough. You can use the fork to spread it evenly as well.
- Pastry Brush Alternatives:
- Silicone or Rubber Gloves: Dip your fingers in the beaten egg and gently rub it onto the surface of the dough.
- Paper Towel: Dip a small piece of paper towel into the beaten egg and lightly dab it onto the pastry.
- Spoon: Pour a small amount of beaten egg onto the pastry and use the back of a spoon to spread it evenly.
- Spray Bottle: If the egg wash is thin enough, you can use a clean spray bottle to mist it over the pastry.
- Your Hands: If you don’t mind getting a little messy, you can simply use your clean hands to rub the beaten egg onto the dough.
Read>> Can Dogs Have BBQ Sauce?
How do you make a kitchen brush?
Making a kitchen brush at home is a simple DIY project. Here’s a basic guide to create a homemade kitchen brush:
Materials You’ll Need
- Bristles: You can use natural bristles (like those from a broom) or synthetic bristles. The choice depends on your preference and intended use.
- Handle: A wooden dowel or an old wooden handle from another tool works well. The length of the handle is up to you, but it should be comfortable to hold.
- Drill with Drill Bit: You’ll need this to create holes in the handle for inserting the bristles.
- Glue: A strong adhesive like epoxy or wood glue.
- Wire or Twine: This is used to secure the bristles to the handle.
Also read >> Light or Dark Brown Sugar for Ribs – which is Better?
Steps
- Prepare the Handle:
- If you’re using a wooden dowel, make sure it’s cut to your desired length.
- Sand the handle to smooth out any rough edges or splinters.
- Prepare the Bristles:
- If you’re using a broom, you’ll need to cut a section of bristles to the desired length. Use scissors or a utility knife to trim them.
- If you’re using synthetic bristles, you may need to trim them to the appropriate length as well.
- Drill Holes:
- Decide how many holes you want in the handle. The more holes, the denser the bristles will be.
- Drill evenly spaced holes along one end of the handle. Make sure the holes are deep enough to hold the bristles securely.
- Attach Bristles:
- Apply glue to the holes in the handle.
- Insert the trimmed bristles into the holes, making sure they are secure and evenly distributed.
- Allow the glue to dry completely. This may take several hours or overnight, depending on the type of glue used.
- Secure Bristles:
- Once the glue is dry, use wire or twine to tightly bind the bristles to the handle. This provides extra stability.
- Trim and Shape:
- Trim any excess bristle length to create an even brush surface.
- Shape the bristles as desired, whether you want a flat brush or one with a more rounded shape.
- Test Your Brush:
- Test your homemade kitchen brush by using it for its intended purpose. If needed, make further adjustments to the bristles or handle to improve its performance.
That’s it! With these simple steps and some basic materials, you can create your own homemade kitchen brush tailored to your needs.
Courtney is a professional grilling enthusiast who has spent a good portion of his life grilling and exploring different methods and techniques for preparing delicious meals. As he always says, creativity is key to preparing sumptuous meals.